Difference between revisions of "Darth Vader Casting"
| Line 29: | Line 29: | ||
==Manufacture== | ==Manufacture== | ||
| − | The mould was cut into MDF using a 3.175mm tool and a 1.5mm ball nose tool on the [[Superbox CNC Router]]. | + | The mould was cut into MDF using a 3.175mm tool and a 1.5mm ball nose tool on the [[Superbox CNC Router]]. Toolpaths were generated using [[Fusion 360]]. |
After the mould was finished, it was trimmed out of the stock using a band saw and the cavity surfaces were brushed with a small amount of graphite taken from a pencil. | After the mould was finished, it was trimmed out of the stock using a band saw and the cavity surfaces were brushed with a small amount of graphite taken from a pencil. | ||
<gallery mode=packed-hover heights=500px> | <gallery mode=packed-hover heights=500px> | ||
| − | File:Darth Vader Cast 1.jpg | + | File:Darth Vader Cast 1.jpg|3.175mm tool cutting at full depth |
| − | File:Darth Vader Cast 2.jpg | + | File:Darth Vader Cast 2.jpg|Cavities brushed with graphite |
</gallery> | </gallery> | ||
Revision as of 23:48, 28 June 2019
| Darth Vader Casting | |
|---|---|
 | |
| Created | 26/06/2019 |
| Completed | 26/06/2019 |
| Members | Eugene, Danspencer101 |
| Status | Complete |
| Type | Members Project |
| QR code | |
Using the pewter casting equipment in the downstairs metalworking area, Eugene and I cast a couple of Darth Vader heads into an MDF mould that we cut on the Superbox CNC Router.
Design
The mould design was taken from a design made by Timothy Zorn on GrabCAD. I think it was designed with 3D printing in mind because there were some very sharp corners on the model that can't be machined with milling cutters. None the less, we used it anyway! We made a couple of modifications to the model:
- We scaled the depth down in z by about 40% so that it would be millable with the short small diameter cutters I had.
- We moved the sprue to the opposite side of the mould
- We added some air venting to the mould
|
|---|


Manufacture
The mould was cut into MDF using a 3.175mm tool and a 1.5mm ball nose tool on the Superbox CNC Router. Toolpaths were generated using Fusion 360.
After the mould was finished, it was trimmed out of the stock using a band saw and the cavity surfaces were brushed with a small amount of graphite taken from a pencil.
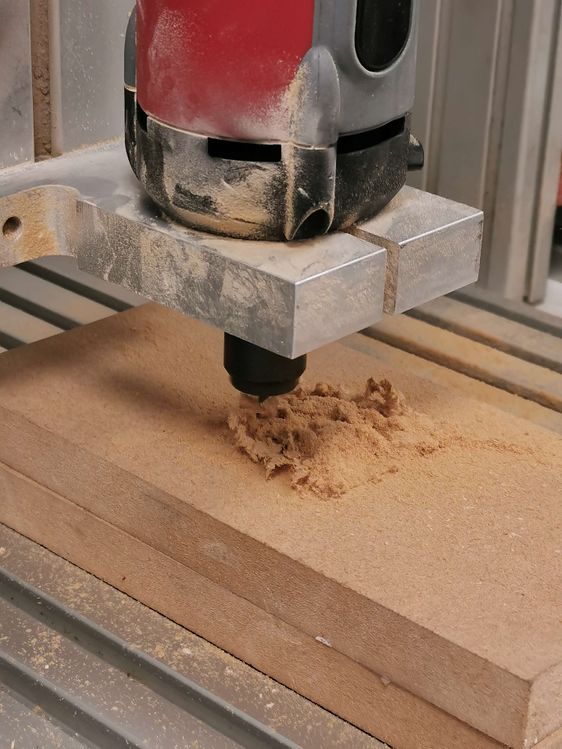
3.175mm tool cutting at full depth
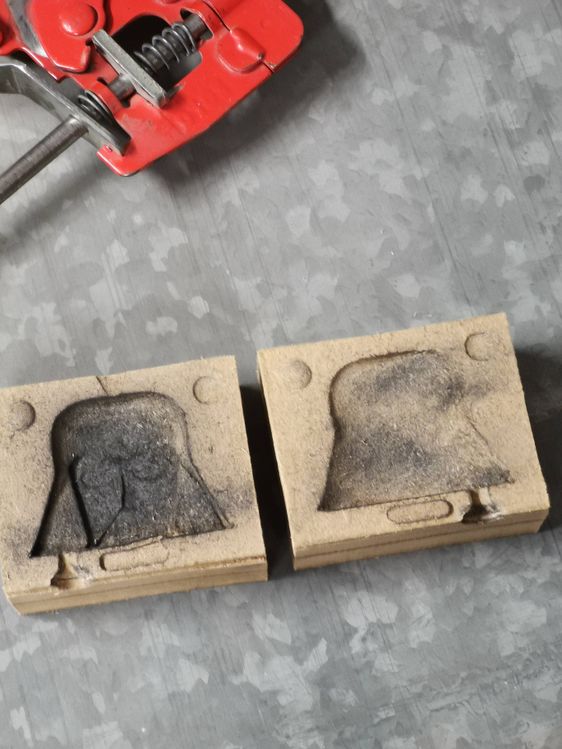
Cavities brushed with graphite

