Difference between revisions of "Darth Vader Casting"
(→Design) |
m |
||
| (3 intermediate revisions by the same user not shown) | |||
| Line 21: | Line 21: | ||
*We added some air venting to the mould | *We added some air venting to the mould | ||
| − | + | <gallery mode=packed heights=350px> | |
| − | |||
File:1 Vader die cavity.PNG|Original Die Cavity | File:1 Vader die cavity.PNG|Original Die Cavity | ||
File:2 Vader die cavity.PNG|Modified Die Cavity | File:2 Vader die cavity.PNG|Modified Die Cavity | ||
</gallery> | </gallery> | ||
| − | |||
==Manufacture== | ==Manufacture== | ||
| Line 43: | Line 41: | ||
A quick clamp was used to keep the mould together during the pouring cycle and the whole assembly was placed onto a large metal tray just in case we spilt any. For pouring, we kept the mould close to the crucible and used a steel ladle with thick gauntlets and safety goggles. | A quick clamp was used to keep the mould together during the pouring cycle and the whole assembly was placed onto a large metal tray just in case we spilt any. For pouring, we kept the mould close to the crucible and used a steel ladle with thick gauntlets and safety goggles. | ||
| − | Generally we got OK results although the castings have picked up the hairy surface of the MDF mould as we suspected they would. Surface finish would probably be better if we'd used french | + | Generally we got OK results although the castings have picked up the hairy surface of the MDF mould as we suspected they would. Surface finish would probably be better if we'd used french chalk or spent more time sanding the cavity before pouring. |
<gallery mode=packed-hover heights=400px> | <gallery mode=packed-hover heights=400px> | ||
| Line 61: | Line 59: | ||
==Polishing== | ==Polishing== | ||
| − | The part polished up quite nicely despite the hairy appearance when it came out of the mould. I think you would be able to get it almost chrome with some more work and a slightly better quality mould cavity. | + | The part polished up quite nicely despite the hairy appearance when it came out of the mould. I think you would be able to get it almost chrome with some more work and a slightly better quality mould cavity. The picture doesn't really do it justice. |
| + | |||
<gallery mode=packed-hover heights=400px> | <gallery mode=packed-hover heights=400px> | ||
File:Darth Vader Cast 7.jpg|The finished part | File:Darth Vader Cast 7.jpg|The finished part | ||
Latest revision as of 00:23, 29 June 2019
| Darth Vader Casting | |
|---|---|
 | |
| Created | 26/06/2019 |
| Completed | 26/06/2019 |
| Members | Eugene, Danspencer101 |
| Status | Complete |
| Type | Members Project |
| QR code | |
Using the pewter casting equipment in the downstairs metalworking area, Eugene and I cast a couple of Darth Vader heads into an MDF mould that we cut on the Superbox CNC Router.
Design
The mould design was taken from a design made by Timothy Zorn on GrabCAD. I think it was designed with 3D printing in mind because there were some very sharp corners on the model that can't be machined with milling cutters. Nonetheless, we used it anyway! We made a couple of modifications to the model:
- We scaled the depth down in z by about 40% so that it would be millable with the short small diameter cutters I had.
- We moved the sprue to the opposite side of the mould
- We added some air venting to the mould
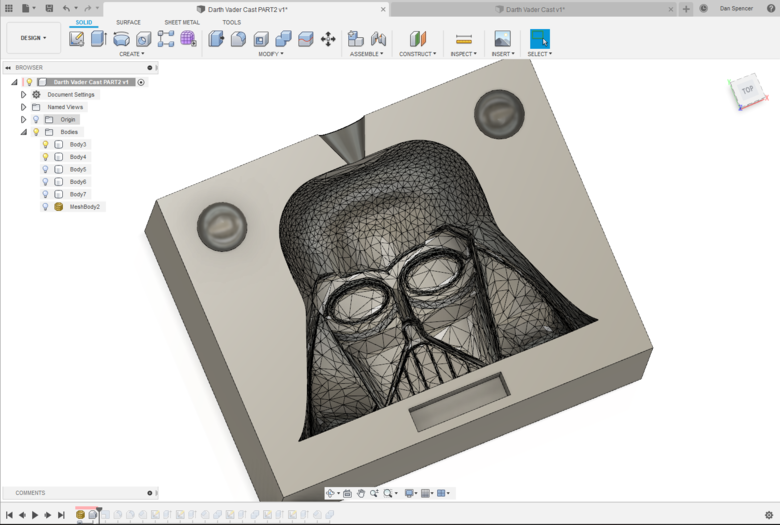
Original Die Cavity

Modified Die Cavity


Manufacture
The mould was cut into MDF using a 3.175mm tool and a 1.5mm ball nose tool on the Superbox CNC Router. Toolpaths were generated using Fusion 360.
After the mould was finished, it was trimmed out of the stock using a band saw and the cavity surfaces were brushed with a small amount of graphite taken from a pencil.
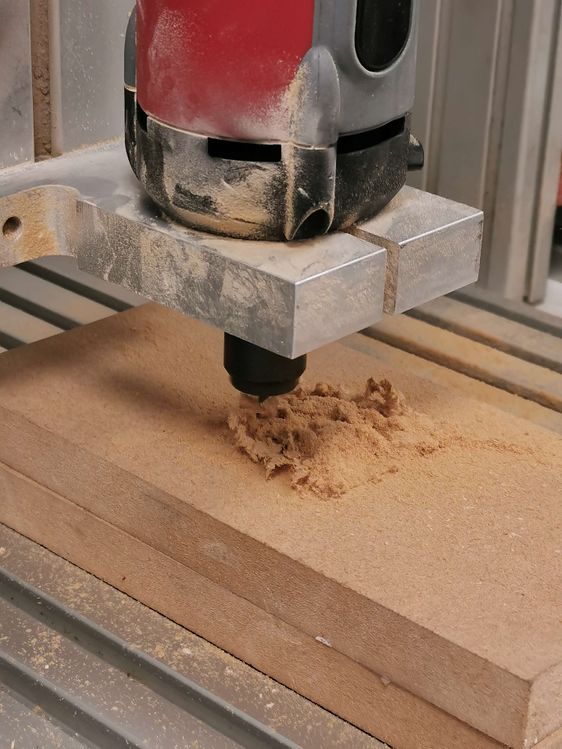
3.175mm tool cutting at full depth
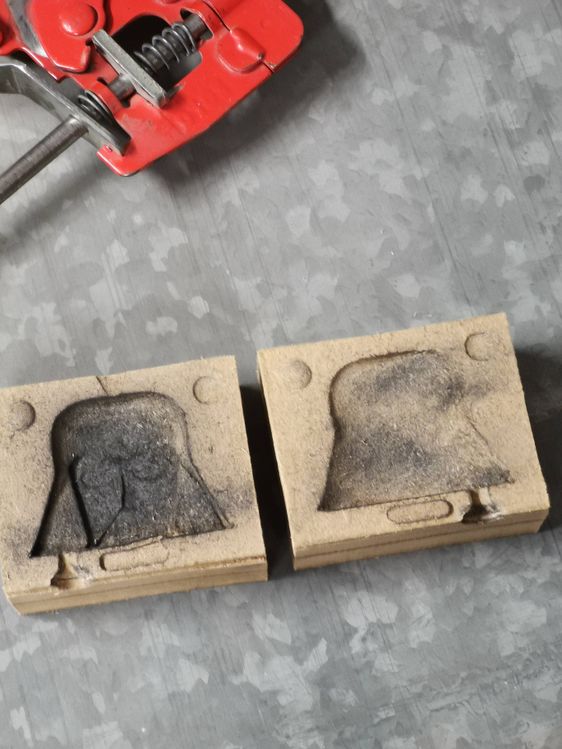
Cavities brushed with graphite


Casting
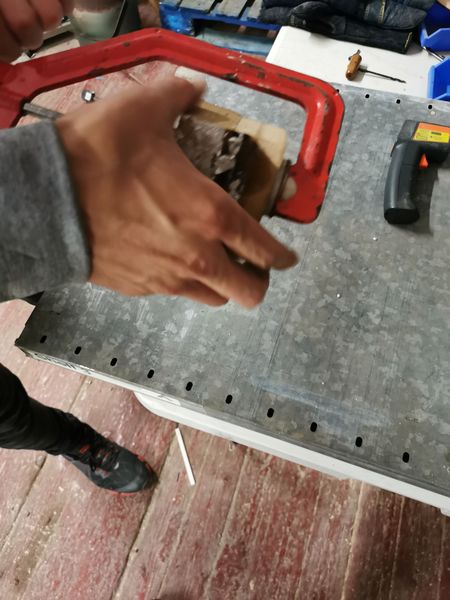
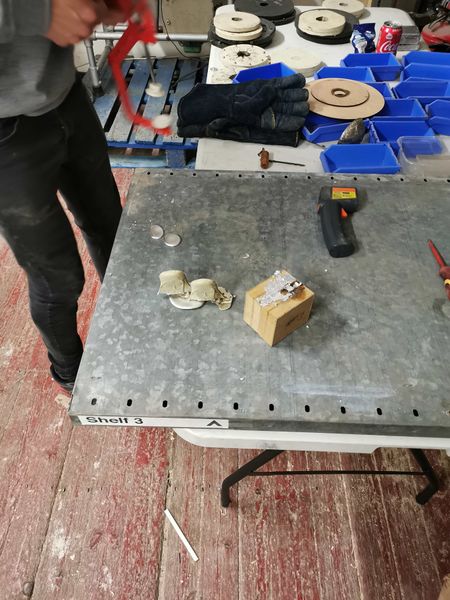
We used Nick's Barlow-Whitney electric crucible downstairs to melt the lead-free pewter. The target pouring temperature was 260°C, a digital IR thermometer was used to verify this temperature had been reached. The MDF mould produced only two successful castings. More would probably be possible if you used proper mould release agent in between each pour. We didn't, only graphite on the very first pour.
A quick clamp was used to keep the mould together during the pouring cycle and the whole assembly was placed onto a large metal tray just in case we spilt any. For pouring, we kept the mould close to the crucible and used a steel ladle with thick gauntlets and safety goggles.
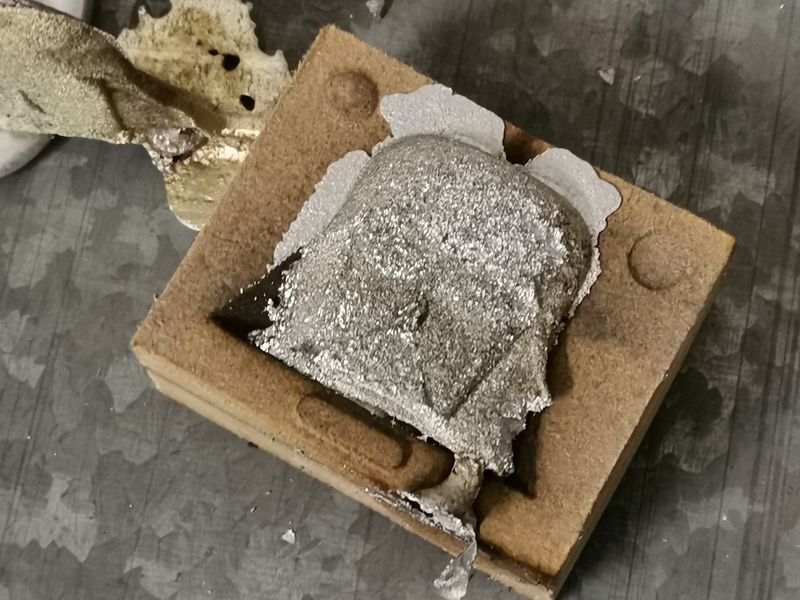
Generally we got OK results although the castings have picked up the hairy surface of the MDF mould as we suspected they would. Surface finish would probably be better if we'd used french chalk or spent more time sanding the cavity before pouring.
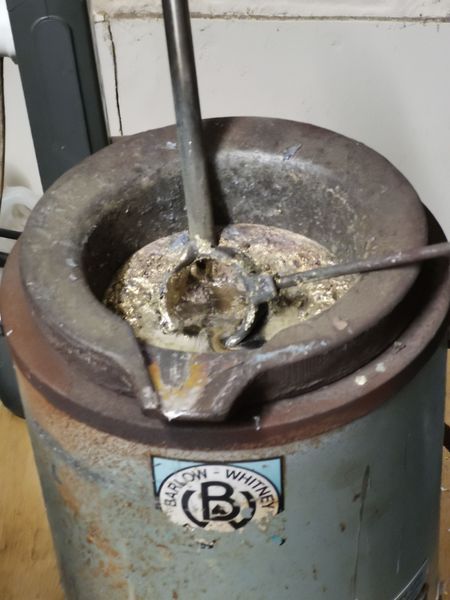
Melting the Pewter in the electric crucible.
Clamping the 2 part mold using a quick clamp
Pouring the metal into the mold

The castings straight out of the mold


Failed Attempt
The third attempt failed possibly because we poured too little or possibly because the mould was shot. This pewter wasn't wasted as it is 100% recyclable, it simply went straight back into the pot after blowing off the dust.
Failed! This was the third casting
The spent mould


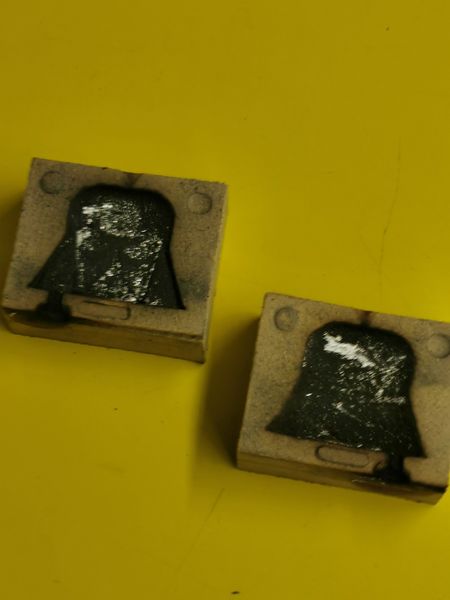
Polishing
The part polished up quite nicely despite the hairy appearance when it came out of the mould. I think you would be able to get it almost chrome with some more work and a slightly better quality mould cavity. The picture doesn't really do it justice.
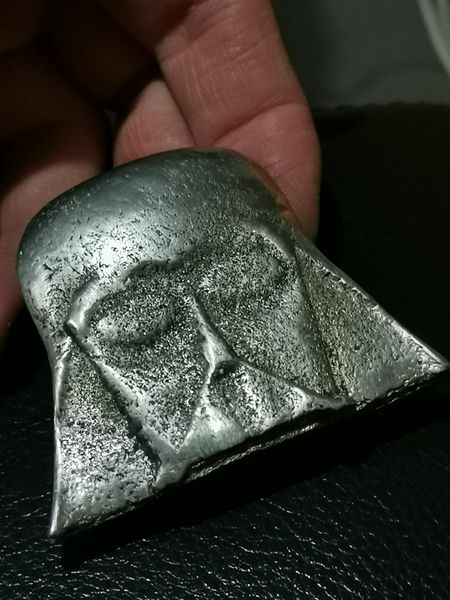
The finished part