Difference between revisions of "Die Casting a Pewter Coin"
| (4 intermediate revisions by the same user not shown) | |||
| Line 14: | Line 14: | ||
}} | }} | ||
After some limited success last week with the [[Darth Vader Casting|MDF mold]], Eugene and I decided to cut an Aluminum die on the [[Superbox CNC Router]] and use the pewter casting equipment in the [[Metalworking Downstairs|downstairs metalworking]] area to cast some coins. | After some limited success last week with the [[Darth Vader Casting|MDF mold]], Eugene and I decided to cut an Aluminum die on the [[Superbox CNC Router]] and use the pewter casting equipment in the [[Metalworking Downstairs|downstairs metalworking]] area to cast some coins. | ||
| + | |||
| + | ==Design== | ||
| + | ===Coin=== | ||
| + | The coin was designed in [[Fusion 360]]. It is 45mm diameter, this was chosen because the aluminium we had for the die was about 50mm across. The total thickness of the coin is 5mm. Where possible we added a 5 degree draft angle onto the coin so that it wouldn't get stuck in the mould when we cast it. The die split line was halfway through the coin with a 5 degree angle applied from the centre. | ||
| + | |||
| + | ===Die=== | ||
| + | We built the die blocks around the coin by creating new components inside the [[Fusion 360]] session. Doing this meant that we could subtract the coin model from the Die blocks to produce the cavity. | ||
| + | |||
| + | The sprue was modeled in along with two holes for alignment dowels and two air bleeds. | ||
| + | |||
| + | ==Manufacturing the Mould== | ||
| + | |||
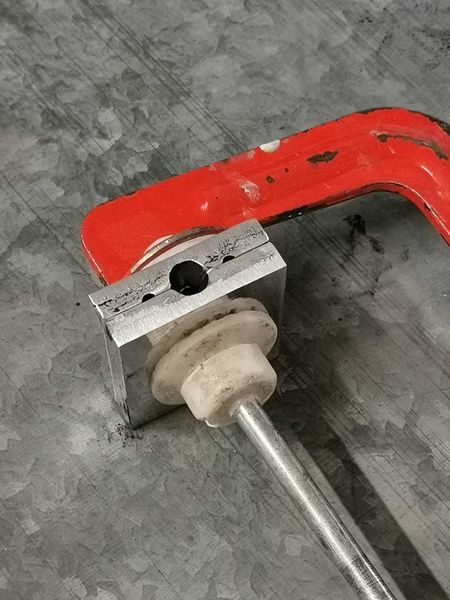
| + | We clamped the Aluminium to the bed using two toe clamps. | ||
| + | |||
| + | We used two tools to cut each side of the mould. The first was the 6mm Flat End Mill for an adaptive clearing toolpath that removed the majority of the material. The second was a 2mm Ball Nose Mill that was used for a 3D parallel toolpath. | ||
| + | |||
| + | Once the CNC cuts on the mould were finished, we took it upstairs and used the [[Startrite Bandsaw]] to remove the excess clamping stock. Burrs were removed with the belt sander/ linisher. | ||
| + | |||
| + | 6mm wooden dowels were taken from the small consumables boxes at the side of the [[Tub Store]]. | ||
| + | |||
| + | <gallery mode=packed-hover heights=400px> | ||
| + | File:Coin Casting (1).JPG|6mm Flat End Mill - Adaptive Clearing Toolpath | ||
| + | File:Coin Casting (2).JPG|2mm Ball Nose Mill - 3D Parallel Toolpath | ||
| + | File:Coin Casting (3).JPG|The completed mould | ||
| + | </gallery> | ||
| + | |||
| + | ==Casting== | ||
| + | <gallery mode=packed-hover heights=400px> | ||
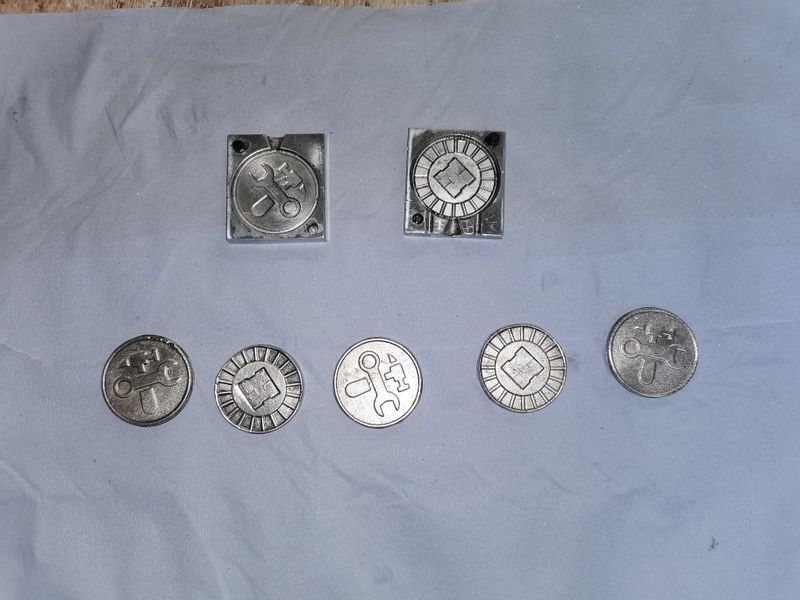
| + | File:Coin Casting (4).JPG|Ready for pouring the pewter | ||
| + | File:Coin Casting (5).JPG|Five coins with sprue still attached. | ||
| + | File:Coin Casting (6).JPG|After removing the sprue and slight polish. | ||
| + | </gallery> | ||
| + | |||
| + | ==Result== | ||
| + | We got a fairly good finish from the castings when they were polished up. The buffing wheel was very aggressive when used with the pewter so some of the coins are a little bit out of round. Need to be careful in the future! | ||
| + | |||
| + | The internal parts of the Hackspace H came out much shallower than we wanted, next time we need to either make the shape bigger in the design or use a smaller tool when cutting the die to get extra detail. | ||
| + | |||
| + | <gallery mode=packed-hover heights=400px> | ||
| + | File:Coin Casting (7).PNG|The nice side. | ||
| + | File:Coin Casting (8).PNG|The other side. | ||
| + | </gallery> | ||
| + | |||
| + | [[Category:Casting]] | ||
| + | [[Category:Featured]] | ||
| + | [[Category:CNC Projects]] | ||
Latest revision as of 21:04, 27 December 2019
| Die Casting a Pewter Coin | |
|---|---|
.PNG) | |
| Created | 03/07/2019 |
| Completed | 04/07/2019 |
| Members | Eugene, Danspencer101 |
| Status | Complete |
| Type | Members Project |
| QR code | |
After some limited success last week with the MDF mold, Eugene and I decided to cut an Aluminum die on the Superbox CNC Router and use the pewter casting equipment in the downstairs metalworking area to cast some coins.
Design
Coin
The coin was designed in Fusion 360. It is 45mm diameter, this was chosen because the aluminium we had for the die was about 50mm across. The total thickness of the coin is 5mm. Where possible we added a 5 degree draft angle onto the coin so that it wouldn't get stuck in the mould when we cast it. The die split line was halfway through the coin with a 5 degree angle applied from the centre.
Die
We built the die blocks around the coin by creating new components inside the Fusion 360 session. Doing this meant that we could subtract the coin model from the Die blocks to produce the cavity.
The sprue was modeled in along with two holes for alignment dowels and two air bleeds.
Manufacturing the Mould
We clamped the Aluminium to the bed using two toe clamps.
We used two tools to cut each side of the mould. The first was the 6mm Flat End Mill for an adaptive clearing toolpath that removed the majority of the material. The second was a 2mm Ball Nose Mill that was used for a 3D parallel toolpath.
Once the CNC cuts on the mould were finished, we took it upstairs and used the Startrite Bandsaw to remove the excess clamping stock. Burrs were removed with the belt sander/ linisher.
6mm wooden dowels were taken from the small consumables boxes at the side of the Tub Store.
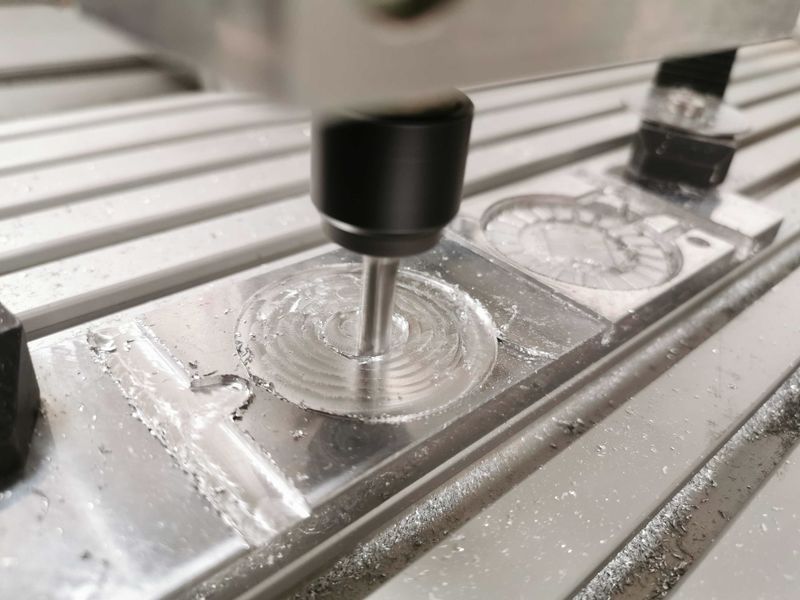
6mm Flat End Mill - Adaptive Clearing Toolpath
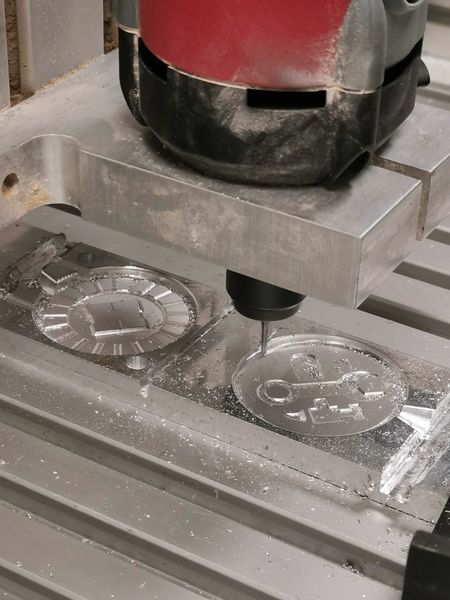
2mm Ball Nose Mill - 3D Parallel Toolpath
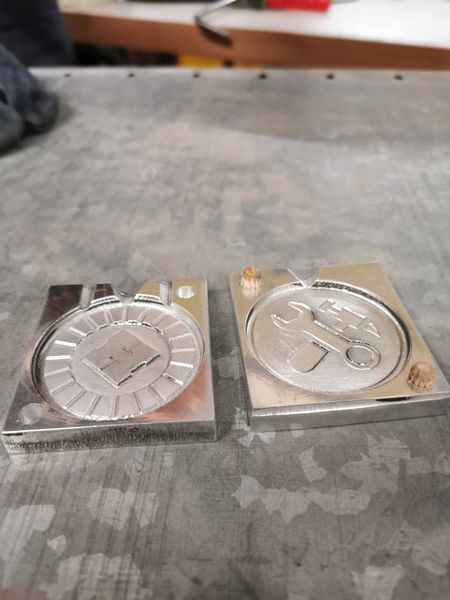
The completed mould
.JPG)
.JPG)
.JPG)
Casting
Ready for pouring the pewter
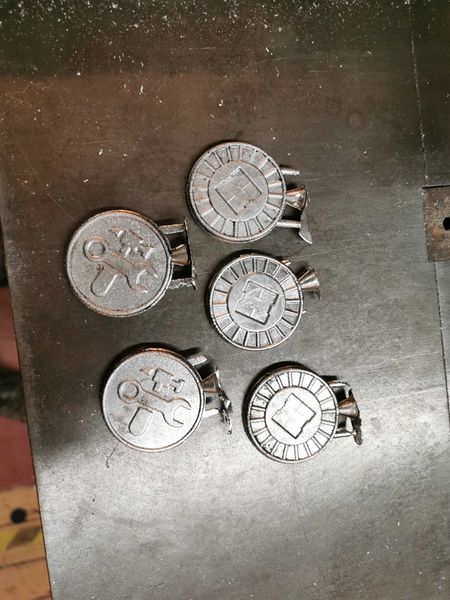
Five coins with sprue still attached.
After removing the sprue and slight polish.
.JPG)
.JPG)
.JPG)
Result
We got a fairly good finish from the castings when they were polished up. The buffing wheel was very aggressive when used with the pewter so some of the coins are a little bit out of round. Need to be careful in the future!
The internal parts of the Hackspace H came out much shallower than we wanted, next time we need to either make the shape bigger in the design or use a smaller tool when cutting the die to get extra detail.
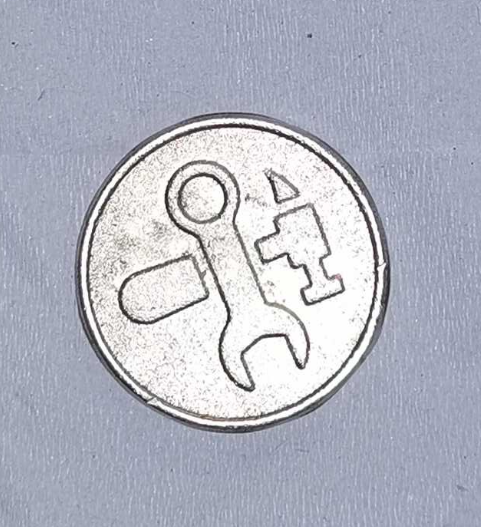
The nice side.

The other side.
.PNG)