Help:Uploading images
Jump to navigation
Jump to search
- See also: Help:Contents and Help:Images (adding to pages)
This page explains how to upload images to this wiki. We upload images to the wiki so they can be embedded in wiki pages.
Uploading a single image
You can upload images one-at-a-time on the Special:Upload page:
- On the left-hand sidebar, under “toolbox”, click “Upload file.”
- Select the “Source filename”
- Fill in the optional “Summary” text.
Adding information about the image
If you upload an image with a name like "DSC0013424.JPG", then please choose a more meaningful Destination filename on the upload page, as it makes linking to the image easier.
A description, license information and categories can be added in the summary (it can be update late by going to image page and clicking edit). Example summary in wiki markup:
==Summary==

'''Source:''' https://en.wikipedia.org/wiki/File:Cat_silhouette.svg

'''Licence''' [[wikipedia:Public domain]]

[[Category:Design and graphics]]
Uploading a set of images
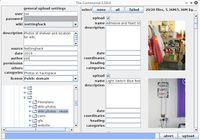
The program Commonist can be used to upload a whole batch of images. You can set it up as follows:
- 1) Install Commonist by following installation instructions for your operating system, as shown here.
- (unfortunately the 'Easiest way' described in those instructions -- using JNLP -- will not work! You must install the program to your computer).
- 2) Open the file 'etc/wikis.txt' in the folder where the Commonist is installed. If the 'etc' folder and 'wikis.txt' file don't exist create them.
- 3) Add the following line of text to the 'wikis.txt' file:
nottinghack _ https://wiki.nottinghack.org.uk/api.php
- 4) Now you can run Commonist and select 'nottinghack' in the list of Wikis.
Flickr
 Note: If you want to upload a whole gallery of photos it may be better to use the Nottinghack flickr group.
