Difference between revisions of "Laser Acrylic Shelving"
m (Danspencer101 moved page Laser Acrylic Shelving to Project:Laser Acrylic Shelving) |
m (Danspencer101 moved page Project:Laser Acrylic Shelving to Laser Acrylic Shelving over redirect) |
(No difference)
| |
Latest revision as of 11:54, 5 February 2019
| Laser Acrylic Shelving | |
|---|---|
 | |
| Primary Contact | Michael Erskine |
| Created | 09/06/2014 |
| Status | Complete |
| Type | Members Project |
| QR code | |
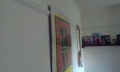
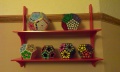
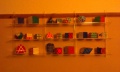
Simple slot together shelving for display of a Rubik's Cube type puzzle collection.
- replacing a simple shelving system made from regular crystal CD cases
- too brittle - "the world's most brittle material"
- too fiddly - hard to make - needed reinforcement with superglue
- hard to clean - turned out to be a dust collection system
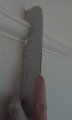
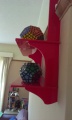
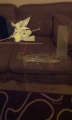
Prototype 1
Picture rail
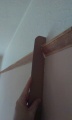
Picture rail profile
Picture rail profile
cutter
prototype front view
prototype rail hook detail
prototype side view


- my first real use of the new A0 laser cutter at the Hackspace
- using various offcuts from the bulk red 5mm acrylic available at the Hackspace
- picture rail profile cutout for hanging
- profile for the picture-rail on the prototype seems to work OK
- it looks rather gross - a sort of 70's cheap and nasty!
- I think it must be a combination of the red acrylic and my overuse of Bézier splines
- the next version will be a simpler and blockier design
- also I will be using clear acrylic to make the shelves themselves less obvious
- shelf is 440 x 140
- will be reduced to 120 depth and 300 between uprights
Next version: -
- need some quality material
- 4x uprights with 300mm shelf spans (to fit 1000mm acrylic sheet)
- 3x shelves at just shy of 1000mm long and 120mm shelf depth
- stick with 140mm shelf spacing?
- modernise design - actual angles? less curves?
- make it look like glass wherever possible
Second Build
I ordered a sheet of 1000x600 5mm thick clear acrylic from Kitronic (£23.10) and modernised the design as planned. The cut went well although I had to run at a lower than normal speed for 5mm acrylic to cut though it: 10mm/s at 65% power. Done Weds 25th June 2014.
cut parts kit
peeled parts
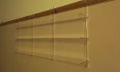
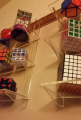
in place
loaded with cubes


The design process was quite enjoyable in Inkscape: I have a good setup with all the appropriate tool preferences for laser cutting. The most important option IMHO is for the thickness of the path outlines to be ignored in the size of an object. The outlines are only there to allow me to draw them and their thickness is irrelevant in the design. The fancy shapes are easily made by performing operations on paths. A help file is available online at http://tavmjong.free.fr/INKSCAPE/MANUAL/html/Paths-Combining.html
Third Build
Over a year later, as part of my lounge refurb, I needed to get more puzzles out of the way so I cut another set on Sunday November 30th 2015. Again I bought my 1000x600 sheet of 5mm thick clear acrylic from Kitronik (price dropped to £20.40) and kept the exact same design to match the existing unit. The laser bed was out of alignment and required adjusting on my first test cut a few days earlier and then a fire in the laser meant it was down again for repairs. When back in action I went for cutting the design piece by piece but still found that seemingly random parts of the design had not cut through properly (not based on location on the bed but more based on how late in the job the cuts were). I had no intention of wasting the material so I chose to do a lot of manual breakout and filing to get everything in a reasonable state for assembly. Some of the ends of the shelves broke off in the process so I intend to repair those cosmetically later.
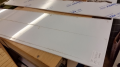
Failure to cut through towards end of job

Both sets loaded


