Difference between revisions of "Les Plywood"
m |
|||
| Line 203: | Line 203: | ||
====Truss Rod==== | ====Truss Rod==== | ||
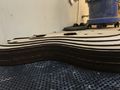
| − | In order to adjust the action of the neck, a truss rod is needed. Without looking into it too much I ordered this 480mm one from ebay: https://www.ebay.co.uk/itm/391966334841 | + | In order to adjust the action of the neck, a truss rod is needed. Without looking into it too much I ordered this 480mm dual action one from ebay at a cost of just under £10: https://www.ebay.co.uk/itm/391966334841 |
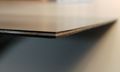
| − | + | It has now arrived and is exactly the width of two sheets of 3mm plywood! This makes me very happy as it massively simplifies the neck construction. | |
| + | |||
| + | [[File:Les Plywood - Truss Rod Width.jpeg|200px|thumbnail|none|Truss Rod Thickness]] | ||
== Creating the Other Hardware== | == Creating the Other Hardware== | ||
Revision as of 17:51, 2 January 2019
| Les Plywood | |
|---|---|
| Created | 21/12/2018 |
| Members | danspencer101 |
| Status | In Progress |
Intro
Can a Les Paul guitar be produced through laser cutting? Probably, yes but anyone who knows anything about guitars would ask why... Well, I wanted to give this a go for no real reason other than its something to do that will challenge my skills. I am under no illusions that plywood is not an ideal material for an electric guitar but I'm going to try it anyway!
Making the Body
CAD
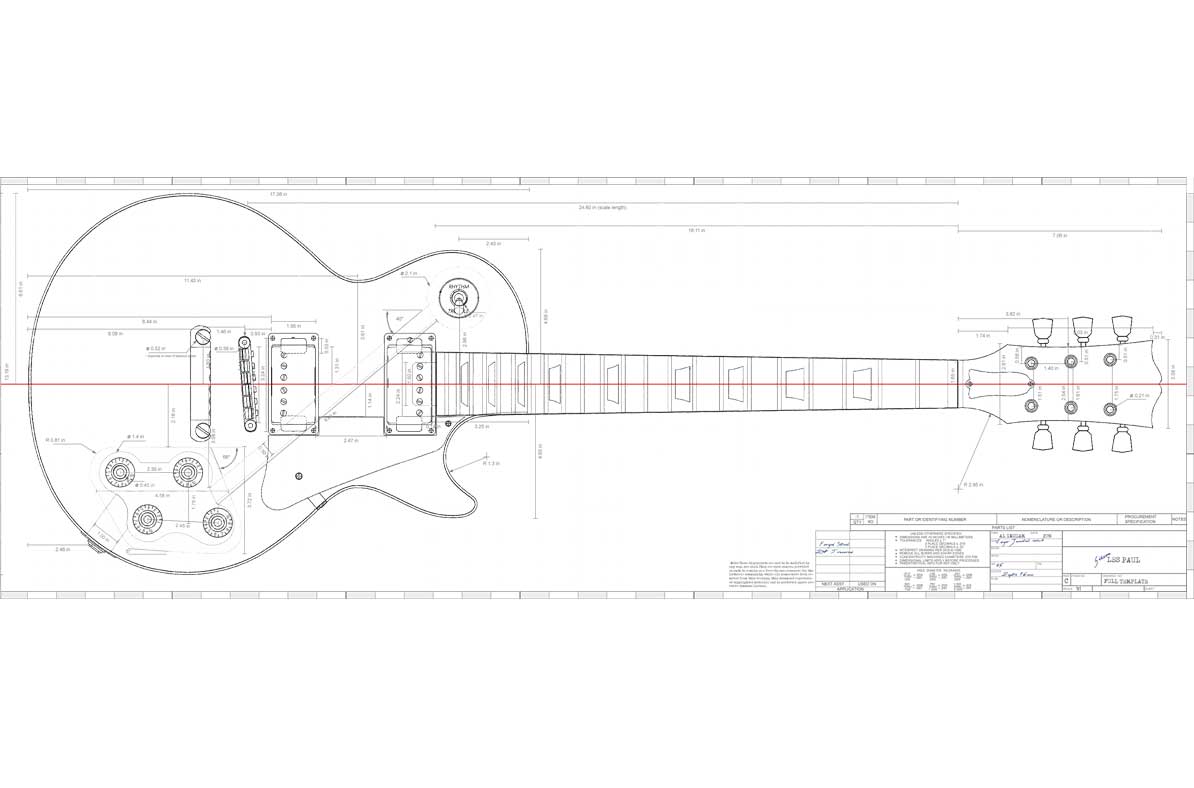
Model in Fusion 360
First things first I needed a model to create the DXF files for the laser cutter. I used a reference image that I found online and modelled it up in Fusion 360. See Here for the reference I used. I have deviated slightly from the plan as it is very badly drawn and doesn't follow any engineering standards at all. Anyway, it was good enough for me to put together a model :)

Once I had the model in Fusion 360 I produced a stack of planes that intersected the model and put a blank sketch on each of these planes. I then named all of the sketches to DXF Sketch 1 through to 8 as shown in the image. To pick up the geometry of the model you need to do an intersect in the sketch, its not automatic as I first thought. Then right click the sketch and save to DXF.


Arrange in Inkscape
With the DXF stack ready I then moved over to inkscape. Importing the sketches one at a time (Making sure to check that I was working in mm) and arranging them onto the 800mmx600mm page resulted in something that looks like this. These can then be taken over to Lasercut5.3 via any method you prefer.

Laser Cutting
I took a couple of videos and have uploaded them to youtube. See below.
Apologies about the vertical video, what was I thinking!
Gluing
Alignment
I put some through going 5mm holes into the model for aligning the stack. I used M5 machine bolts and was able to unscrew them once the glue dried. This alignment method has worked quite well but hasn't resulted in a perfectly smooth external surface. Oh well, the imperfections can be sanded away and any that remain will just add character. The very top layers were aligned using 10mm dowels in the holes where the bridge will go. Seemed to work ok!


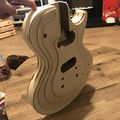
Clamping Arrangement
Stage 1
Stage 2

.jpeg)
Result
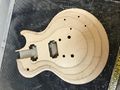
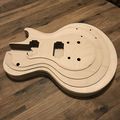
Electronics Pocket
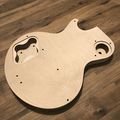
Pickup Selector Pocket
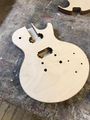
Flat Top (Note this picture was taken before I glued on the curve top layers)
With the curve top on
Another with the curve top on


Sanding
I hadn't originally intended to sand this at all but the edges were just a bit too rough due to the misalignment between layers and it didn't feel nice to hold so my hand was forced. The top was sanded using the mouse/ palm sander in the dusty area. I wanted to maintain the layered look of the laser cut layers so didn't go over the top; just broke the sharp edges.
For the edges I used a combination of the disk sander and a drill mounted drum sander, both inside the dusty area. This worked well and has made the guitar nicer to hold whilst maintaining the characteristic layered effect of the ply.
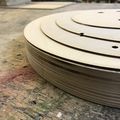
Layers easily visible on the Edge but overall quite smooth
Top View
Back View
Curve Top


Building the neck


CAD
I have modelled the neck with a 5 degree angle from the body and a 15 degree head stock angle. Still need to model in the slot for the truss rod and frets. I'm waiting for the truss rod to arrive before I model it in so I can measure it and get the anchor points correct. I'd like to do the majority on the laser with ply and then glue an approx 5mm thick hardwood veneer on top for the fret board.
Fret Positions
The model I'm producing has a scale length of 625mm. That is the distance of the vibrating length of string, as the scale length affects the sound the guitar makes it is important to get the frets in position as accurately as possible. The numbers below were taken from the fret calculator here: https://www.stewmac.com/FretCalculator
| Fret | Distance from nut | Fret to Fret Distance |
|---|---|---|
| 1 | 35.079mm | 35.079mm (nut-1) |
| 2 | 68.188mm | 33.110mm (1-2) |
| 3 | 99.440mm | 31.251mm (2-3) |
| 4 | 128.937mm | 29.497mm (3-4) |
| 5 | 156.779mm | 27.842mm (4-5) |
| 6 | 183.058mm | 26.279mm (5-6) |
| 7 | 207.863mm | 24.804mm (6-7) |
| 8 | 231.275mm | 23.412mm (7-8) |
| 9 | 253.373mm | 22.098mm (8-9) |
| 10 | 274.231mm | 20.858mm (9-10) |
| 11 | 293.918mm | 19.687mm (10-11) |
| 12 | 312.500mm | 18.582mm (11-12) |
| 13 | 330.039mm | 17.539mm (12-13) |
| 14 | 346.594mm | 16.555mm (13-14) |
| 15 | 362.220mm | 15.626mm (14-15) |
| 16 | 376.969mm | 14.749mm (15-16) |
| 17 | 390.890mm | 13.921mm (16-17) |
| 18 | 404.029mm | 13.140mm (17-18) |
| 19 | 416.431mm | 12.402mm (18-19) |
| 20 | 428.137mm | 11.706mm (19-20) |
| 21 | 439.186mm | 11.049mm (20-21) |
| 22 | 449.615mm | 10.429mm (21-22) |
Gathering Materials
Fret Board
I have ordered a piece of Indian Rosewood from Ebay. Price including postage £12.30. The piece is a little bit larger than I require so I will be testing it in the laser cutter when it arrives to see if I can engrave the inlays/ fret locations.
https://www.ebay.co.uk/itm/Guitar-Indian-Rosewood-Fretboard-luthier-Tonewood/123489924277
Fret Wire
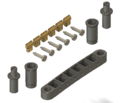
I have ordered 1.8m of DHP-20 fret wire from eBay. Cost including postage approx. £20

DHP-20 Wire
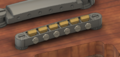
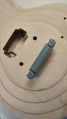
Truss Rod
In order to adjust the action of the neck, a truss rod is needed. Without looking into it too much I ordered this 480mm dual action one from ebay at a cost of just under £10: https://www.ebay.co.uk/itm/391966334841
It has now arrived and is exactly the width of two sheets of 3mm plywood! This makes me very happy as it massively simplifies the neck construction.

Creating the Other Hardware
I could just buy this stuff in cheaply but I want to have a go at making it all my self. I'll try to document my thought & manufacturing processes as best as I can.
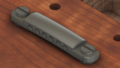
Tune-O-Matic Bridge

The tune-o-matic bridge is used to anchor the strings on the body of the guitar. There are two parts to it; the stop bar and the bridge itself.
CAD
The bridge assembly has been modelled below. There are no complicated over-hanging features meaning that it could be produced through conventional metal working processes or through casting. There are no notches for the strings on the bridge as these will be put in by hand. I haven't modelled the threads in for the pegs yet as I haven't researched what diameters I need to leave, I will fix these areas before cutting metal so I can tap threads.
Bridge

Anchors

Pegs
Bridge
Exploded view of assembly


Stop Bar

Anchors
Pegs
Everything in place


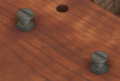
3D Print Size Check
Although I was confident that the part would fit the guitar, I wanted to check that the radius on the top was OK as its quite hard to gauge through the computer screen. I was quite happy with the result! This was printed on my CR-10s at home but could easily have been done on the 3D Printer at the hackspace.

Parts before fitting
Fits nicely


String Spacing
In the initial revision, I modelled a string spacing of 8.75mm. Today I've checked the printed part against one of my guitars and it seems a little small so I will be increasing it to 10.4mm. This looks much more like the real part.


Manufacturing
Still unsure on how I will produce these parts. I think my options are:
- Simplify the model and manually Mill
- Some kind of CNC Milling
- Sand Casting
- Lost PLA Casting
For the anchor and peg pieces, I have ordered some aluminium round bar and intend to produce these on either the CNC lathe or manual lathe.
Pickups
Intending to hand wind these.
Strap Buttons
These will be cut on the Lathe using aluminium bar.
Pick Guard
I have ordered a sheet of 30cm x 30cm 3 Ply PVC sheet. As PVC is not laser safe I will be cutting this using the CNC Mill.
Although this material has already arrived it will be one of the last things I work on for this project.
Black, White, Black Laminations
