Difference between revisions of "Superbox CNC Router"
m (→Y Axis) |
|||
| Line 22: | Line 22: | ||
==Y Axis== | ==Y Axis== | ||
Due to the gantry Y axis having a dual stepper drive the mill is using a development version of LinuxCNC 2.8, which can currently can cause some issue on start up.<br/> | Due to the gantry Y axis having a dual stepper drive the mill is using a development version of LinuxCNC 2.8, which can currently can cause some issue on start up.<br/> | ||
| − | The Y axis is also fitted with two stops, the second of which was designed and | + | The Y axis is also fitted with two stops, the second of which was designed and added by the hackspace to help in keeping the Y axis homing square to the X axis |
==Spindle== | ==Spindle== | ||
Revision as of 15:22, 17 April 2019
- See also: New CNC PC Pledge
| Superbox CNC Router | |
|---|---|
 | |
| Manufacturer | Marchant Dice |
| Obtained | 2016 |
| Location | CNC Area |
| Team | Tools |
| Induction Required | No |
| Tools: all pages • list • Power Tools • Broken tools {{}} | |
About
The CNC Mill was acquired from Wireless Things in 2016 after their close. The machine is quite unique in having a dual Y axis stepper setup; however, this does require that the start-up procedure for homeing is carefully followed.
Working area for the mill is: 345mm x 345mm x 150mm
Max feed rate is 1900mm/min.
The spindle is a Kress 1050 FME with manual speed control from 10,000 to 29,000 RPM.
The mill PC is running LinuxCNC with the Gmoccapy interface.
Gmocappy is a more friendly skin/interface to LinuxCNC than the default Axis some people might be more familiar.
More info about Gmocappy can be found here: http://www.linuxcnc.org/docs/2.7/html/gui/gmoccapy.html
Slightly older video but might be useful: https://www.youtube.com/watch?v=O5B-s3uiI6g&t=219s
Y Axis
Due to the gantry Y axis having a dual stepper drive the mill is using a development version of LinuxCNC 2.8, which can currently can cause some issue on start up.
The Y axis is also fitted with two stops, the second of which was designed and added by the hackspace to help in keeping the Y axis homing square to the X axis
Spindle

The Spindle is a Kress 1050 FME. Its speed is manually controlled via the black dial on the top. It is a good idea to set the spindle speed whilst the spindle is stopped to minimize the operator reaching over the moving machine.
Power to the spindle is controlled via LinuxCNC during operation; It will spin up once you start running the G-Code. There is a slide switch on the side of the spindle that should be left on at all times. If it is turned off the tool will simply crash into the work piece without cutting.
| Dial | RPM |
|---|---|
| 1 | 10,000 |
| 2 | 12.600 |
| 3 | 17,000 |
| 4 | 21,000 |
| 5 | 25,000 |
| 6 | 29,000 |
There is a spindle lock button to aid with tool and collet changes
Collets
We have the following collets available, currently stored underneath the monitor for the CNC Computer.
| 1/8" (3.17mm) |
| 6mm |
| 8mm |
| 10mm |
Bed
The bed is made from PT25 profile Aluminium at 375mm wide
This gives slots every 25mm for fixing.
We have a small selection of T-Slot nuts that will slide into these channels to provide clamping anchors. The T-Slot nuts will accept an M6 bolt.
Suitable materials
- Most woods
- Most plastics
- 6082 T6 Aluminium with caution
- Brass with caution
- Others with extreme caution
This machine is best suited to fairly soft materials due to its aluminium frame. Soft woods, such as Pine, can be cut easily with great results. Plywood is a cheap material that can be used to produce simple profiles quickly but is likely to chip if you are doing any moulding operations. Other materials may work with extreme caution; YouTube videos are a good place to start.
If you are planning to cut hard materials materials have a couple of spare tools to hand, as you will no doubt break one. Also, do not underestimate the amount of time it will take to clean the machine after the cut. Please leave the machine as you would like to find it.
Generating G-Code
To control the tool you will need to feed it instructions. This is done through G-Code! There are more than a few options available for generating G-Code. Each has different pros & cons and each requires a different set of skills to operate.
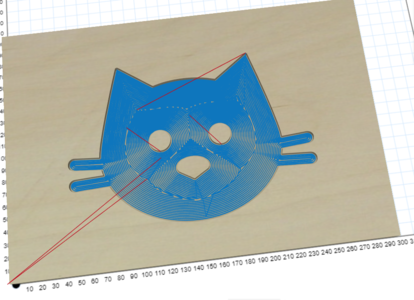
Tool paths from Easel
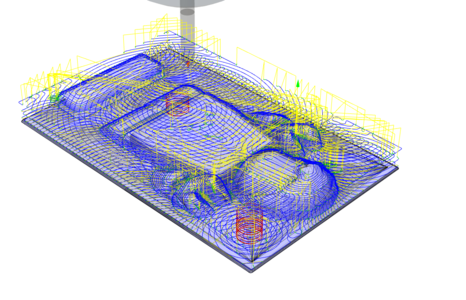
Tool paths from Fusion 360
For Beginners
Inventables' Easel is a 2.5D online CAM package that has a friendly GUI and only requires two small alterations to the code to enable it to function with our machine.
For Enthusiasts/ Advanced Users
Fusion 360 is a great free software package that has tons of CAM functionality built in. Once you have set up your tool paths using the CAM tools in Fusion you can export the setup using the Enhanced Machine Control post processor built in to Fusion 360. A good place to start if you're not sure with CNC programming via Fusion 360 is the NYCCNC Youtube channel.
Operation Instructions
Safety
This is a dangerous tool and should be treated as such. Your safety is your own responsibility. As a guideline, you should wear as a minimum:
- Safety Glasses
- Flying Chips, Broken Tools & loose workpieces are all possibilities
- Ear Defenders
- This machine is seriously loud, you must sit very near to it to monitor the job while it’s running and it’s not uncommon for a cutting cycle to be 30 minutes or longer. Hearing damage is a very real risk. Make sure you also warn others in the CNC room of this too.
Loading your tool
When loading your tool you need to ensure that as much of the shank is contained within the collet as possible. The only exception to this rule is if the job you are running requires a deep cut; then you will need the tool to stick out further.
The video below shows how to load a tool:
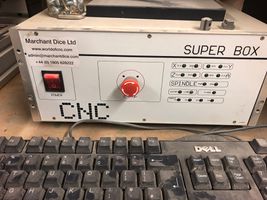
Turn on
Turn on the monitor, PC and Control box
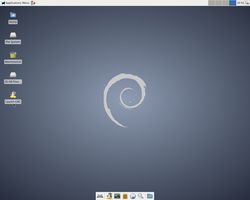
The PC should auto boot into linux and automatically log in to the nottinghack account, if not the password is hackspace
Once in you should see the following desktop, click on the Launch CNC icon to start LinuxCNC
1. Turn on the PC & Control Box
2. Click 'Launch CNC' (Penguin Icon)
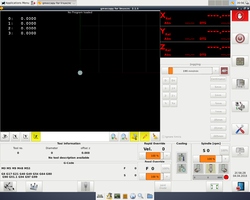
3. Your should now see the
Gmoccapyinterface to LinuxCNC


Emergency Stops
Make sure the physical eStop's have been cleared by twisting them and check that the eStop light on the control box is out.
Reset The linuxCNC software eStop by clicking the red hand icon in the top right corner.
Turn on the machine in the software by clicking the power button just below the software eStop.
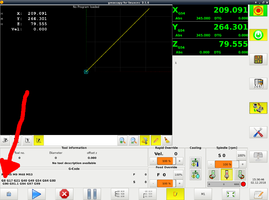
The Interface should look like this:
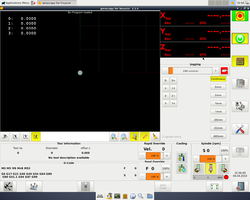
4. Software ready to home

Homing
The machine starts-up in joint mode, in this mode it is possible to move each stepper motor (0,1,2,3) independently but doing so can damage the Y axis.
To use the machine we need to be in world mode where we operate X,Y,Z axis, LinuxCNC automatically switches to world mode once all the joints have been homed, but it is important to only ever use the 'Home all' option as homing a single joint at a time will damage the Y axis.
To open the Home menu click the icon in the bottom left corner of the interface. (Target and three arrows)
In the bottom menu now click the Home all Icon (far left)
The machine should now be ready to go.
Important There should be no need to home the machine again however if you need to (due to axis slip or a crash) please close LinuxCNC first and start again, as homing in world mode is not supported.

5. Open the Homing menu (Target and three arrows icon)

6. Home all joints
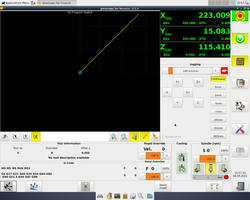
7. Machine ready to go


Loading G Code
After you have homed the machine using the instructions above, Click "Enter auto mode to run programs" on the right hand side menu.
On the bottom row of icons you will see a folder icon. Click this to navigate to your ".ngc" G-Code file.
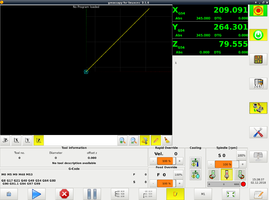
8. Enter Auto Mode
9. Browse to G-Code file


Setting Zero
G54 is a constant value that is used to provide the offset for the local coordinate system. I.e. It is used to tell the CNC software where you have secured your work-piece to the table (Set Zero). It needs to be set before any program is run!

To set it,
- Enter Manual Jogging mode by pressing the appropriate button on the right hand side or pressing F3 on the keyboard.
- Open the probing menu by clicking on the blue icon at the bottom.
- Use the control arrows to move the gantry so that the centre of the tool is sitting on the point where (X,Y,Z) is (0,0,0) on your CAD model. It is easier to probe one datum at a time. E.g. X, then Y, then Z
- On the bottom bar, press "X=?", "Y=?" OR "Z=?" depending on the direction you have probed and set the zero point.
Accounting for the diameter of the tool can be done by typing in half the tools diameter into the probing menu box. Check its right before running any G-Code by jogging the tool to X=0, Y=0 at a safe Z height; the centre axis of the tool should be over the datum point.
If everything has been set correctly, you should see the preview of your G-Code shift to the correct location.
Running a job
Once G54 is set and the code is loaded simply press the Play button located in the "Auto Mode" menu. Don't leave the job unattended and be ready with the Hoover as a lot of sawdust can be produced.
Example Projects
If you have a project that uses this tool please add it to this list. It would be great to see what other people are using the CNC Mill for!
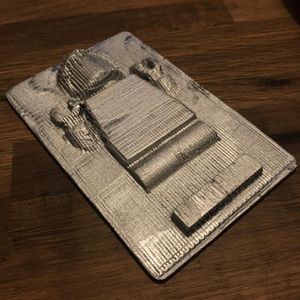
Han Solo in Carbonite CNC
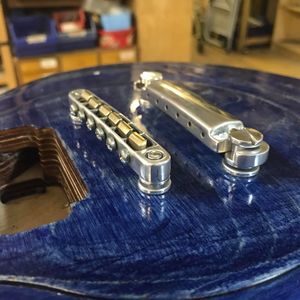
Les Plywood Tune-O-Matic Bridge Hardware
CNC Workshop for Beginners

WW2 Prop Gold