Superbox CNC Router

About
The CNC Mill was acquire from Wireless Things in 2016 after there close. The machine is quite unique in having a dual Y axis stepper setup however this does require the that startup procedure for homeing is carefully followed
Working area for the mill is 300mm x 300mm x 150mm
Max feed rate is 1900mm/min
The spindle is an Kress 1050 FME with manual speed control from 10,000 to 29,000 RPM
The mill PC is running LinuxCNC with the Gmoccapy interface
Gmocappy is a more friendly skin/interface to LinuxCNC than the default Axis some people might be more familiar.
More info about Gmocappy can be found here http://www.linuxcnc.org/docs/2.7/html/gui/gmoccapy.html
Slightly older video but might be useful https://www.youtube.com/watch?v=O5B-s3uiI6g&t=219s
Y Axis
Due to the gantry Y axis having a dual stepper drive the mill is using a development version of LinuxCNC 2.8, which can currently can cause some issue on start up.
The Y axis is also fitted with two stops, the second of which was designed and add but the hackspace to help in keeping the Y axis homing square to the X axis
Machine start up
Turn on
Turn on the monitor, PC and Control box

The PC should auto boot into linux and automaticly log in to the nottinghack account, if not the password is hackspace
Once in you should see the following desktop, click on the Launch CNC icon to start LinuxCNC

Launch
Your should now see the Gmoccapy interface to LinuxCNC
If you get an error message restart the pc and try again

eStops
Make sure the physical eStop's have been cleared and the eStop light on the control box is out
Reset The linuxCNC soft eStop by clicking the red hand in the top right corner
Turn on the machine by clicking the power button just below
The Interface should look like this

Homing
The machine starts-up in joint mode, in this mode it is possible to move each stepper motor (0,1,2,3) independently but doing so can damage the Y axis
To use the machine we need to be in world mode where we operate X,Y,Z axis, LinuxCNC automatically switch to world mode once all the joints have been homed, but it is important to only ever use the 'Home all' option as homing a single joint at a time will damage the Y axis.
To open the Home menu click the icon in the bottom left corner of the interface. (Target and three arrows)

In the bottom menu now click the Home all Icon (far left)
Warning This will cause the machine to move, please make sure all axis are free and clear to move and nothing is in the way for the spindle head

The machine should now be ready to go
Important There should be no need to home the machine again however if you need to (due to axis slip or a crash) please close LinuxCNC first and start again, as homing in world mode is not supported.

Spindle

The spindles speed control is manually controlled via the dial on the top.
Power is controlled via LinuxCNC during operation but there is also a slide switch in the side of the spindle, this should be left on at all times
| Dial | RPM |
|---|---|
| 1 | 10,000 |
| 2 | 12.600 |
| 3 | 17,000 |
| 4 | 21,000 |
| 5 | 25,000 |
| 6 | 29,000 |
There is a spindle lock button to aid with tool and collet changes
We have the following collets, stored in the draws below the bench
| 1/8" (3.17mm) |
| 6mm |
| 8mm |
| 10mm |
Bed
The bed is made form PT25 profile Aluminium at 375mm wide
This give slots ever 25mm for fixing
File:20mmbedplate.pdf
Loading G Code
After you have home'd the machine using the instructions above, Click "Enter auto mode to run programs" on the right hand side menu. On the bottom row of icons you will see a folder icon. Click this to navigate to your ".ngc" G-Code file.
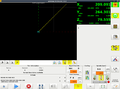
1
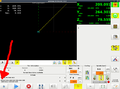
2


Setting G54 and tool offset
G54 Is used to set the local coordinate system. I.e. Used to tell the CNC software where you have secured your work-piece to the table. It needs to be set before the program is run!
To set it, 1) Enter Manual Jogging mode by pressing the appropriate button on the right hand side or pressing F3 on the keyboard. 2) Use the control arrows to move the gantry so that the centre of the tool is sitting on the point where (X,Y,Z) is (0,0,0) on your CAD model. 3) Make a note of the Abs readings on the DRO (Green text on the top right) 4) Open the MDI mode of GMOCCAPY program by pressing the appropriate button on the right hand side or pressing F5. 5) Set G54 by running the following command
  G10 L2 P1 X??? Y??? Z???
  Where ??? are the coordinates you noted down in step 2.
You should see the preview of your g-code shift to the new location.