Howto: Bambu A1 Mini: Difference between revisions
| Line 21: | Line 21: | ||
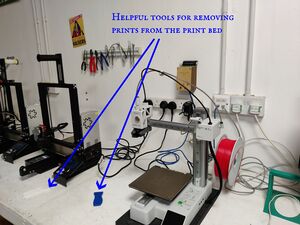
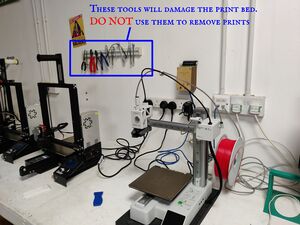
There are various tools available in the 3D print area for snipping filament, helping remove prints from the bed and maintaining the printers. | There are various tools available in the 3D print area for snipping filament, helping remove prints from the bed and maintaining the printers. | ||
Please use the correct tool for the job and if tools are missing let the | Please use the correct tool for the job and if tools are missing let the [[Team:3D_Printing]] know. | ||
[[File:HowtoBambuA1Mini tools.jpg|thumb|center|alt=There are various tools available in the 3D print area for snipping filament, helping remove prints from the bed and maintaining the printers.|There are various tools available in the 3D print area for snipping filament, helping remove prints from the bed and maintaining the printers.]] | [[File:HowtoBambuA1Mini tools.jpg|thumb|center|alt=There are various tools available in the 3D print area for snipping filament, helping remove prints from the bed and maintaining the printers.|There are various tools available in the 3D print area for snipping filament, helping remove prints from the bed and maintaining the printers.]] | ||
Revision as of 19:52, 11 December 2024
Introduction
This is intended to be an easy to follow guide to help people with Bambu A1 Mini basics.
Switch it On
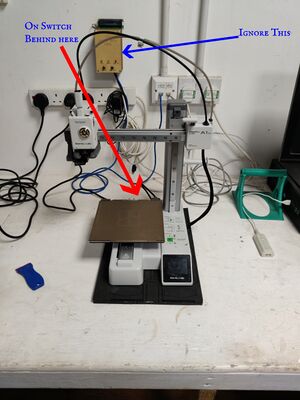
The Bambu A1 Mini is not an induction machine. The card reader on the wall behind it can be ignored. It is from the deprecated Ultimaker printer.
The Bambu A1 Mini on switch is on the back under the print bed.
Check Print Bed
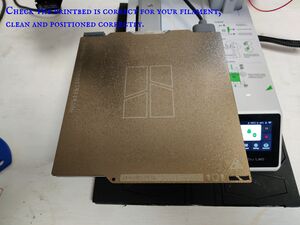
Please check the print bed is clean before you start. Dust, grease and previous users plastic detritus will all work against you trying t get a good print.
(TBD -- Where to find bed cleaning materials)
3D Print Area Tools
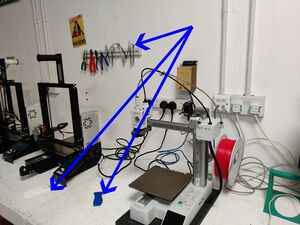
There are various tools available in the 3D print area for snipping filament, helping remove prints from the bed and maintaining the printers. Please use the correct tool for the job and if tools are missing let the Team:3D_Printing know.
Load Filament
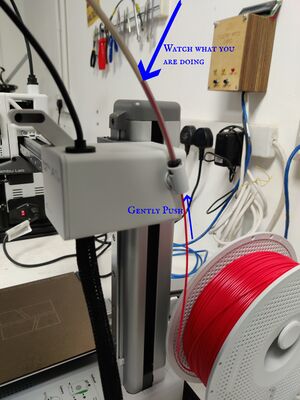
Place your filament on the printer spindle or the filament holder beside it. Take care the filament can move freely and is snag free. The filament should be fed gently into the guide tube until reaches the print head.
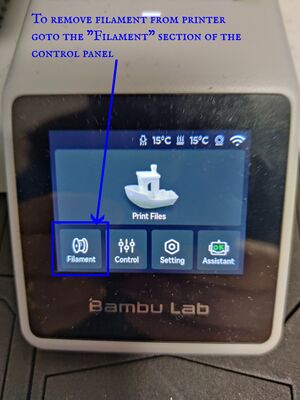
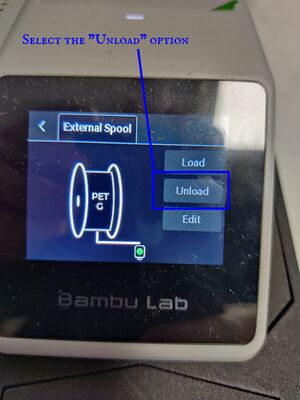
Filament settings, loading and unloading are controlled from the control panel "filament" menu.
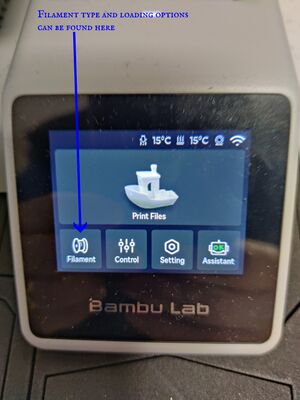
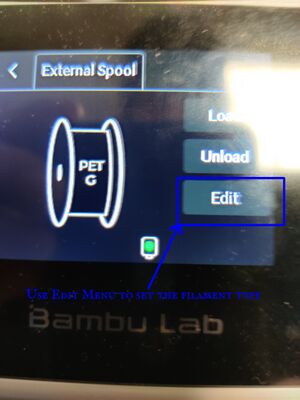
Different filaments need different temperatures and can be printed successfully at different speeds. The filament settings on the printer must match the filament you are using.
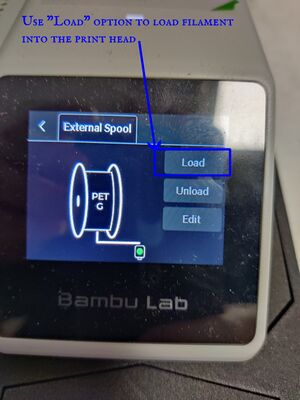
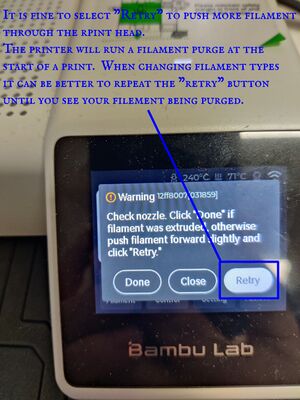
Loading filament into the print head is controlled from the printer control panel. Sometimes the mechanism doesn't grip the filament first time. This is fixed by gently pushing the filament into the printer while retry loading. This may take several attempts.
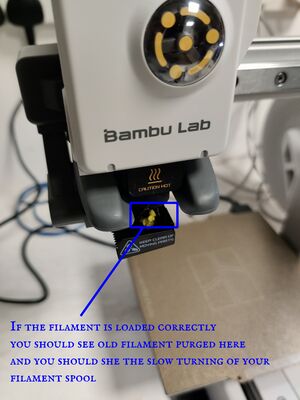
You won't want filament left in the head by the previous user contaminating your print. The printer runs a purge at the start of a print. When the old to new filament colour changes the transition from old colour to new colour can be seen in the purge. Manual "retry" loading new colour filament until it is clear of the old colour, anecdotally, extrudes more filament than is extruded on the start of print purge. Especially when changing plastics you may want to "make sure" by performing a manual purge.
Filament loading can be monitored by watching the filament purged from the head. There is no harm caused by selecting the "retry" option until you are happy except for a small amount of filament being extruded.
Find Access Code
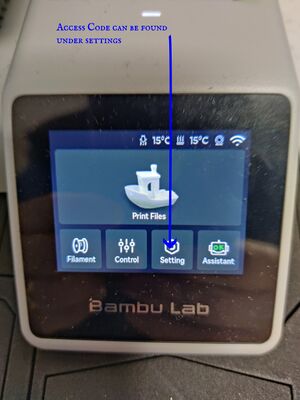
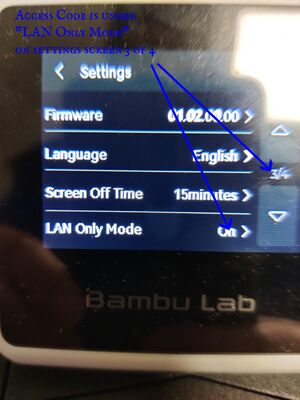
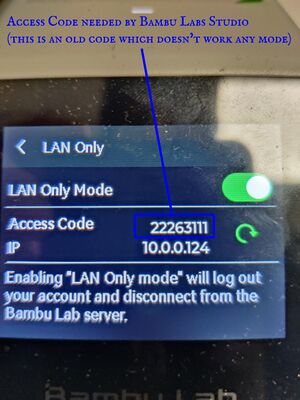
To use the printer from a laptop in the space you will need the printer access code. This can be found using the control panel under Settings; Subpage 3 of 4; LAN Only Mode. The code does change but I'm not sure how often. I have never had it change over a several hours print session but I have had to repeatedly re-enter it into Bambu Labs Studio over that same session.
Filament Stuck
TBD -- Needs photos of relevant screens
When the printer is printing filament can pop off the spool and get caught around the spindle. If this happens the printer will stop waiting for user input. If you are midway through a print the screen will likely be black as well. Just tap the screen to wake it up. There should be a telling you to check your filament and press continue when good to go.
Finished Printing
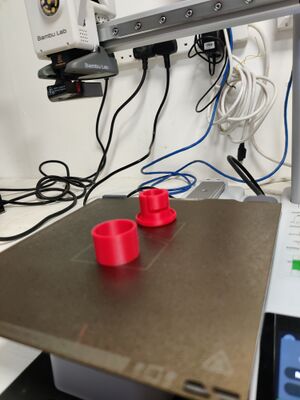
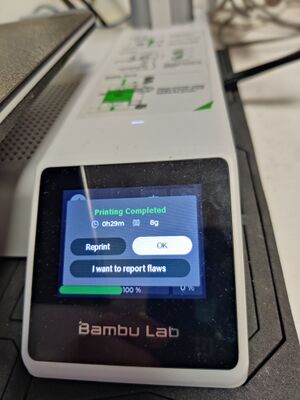
Finished prints will be (slightly) stuck to the print bed. To remove them lift the print bed off the printer and set it aside to cool for a few minutes. The print bed is flexible. Once cool a gentle flexing of the bed is often enough to detach the print. Small pieces can sometimes remain stuck and be difficult to grip to release. If this is the case then the plastic scrapers can be used to help pry the parts from the bed. NEVER use metal tools to do this.
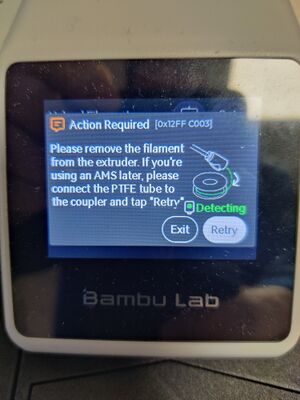
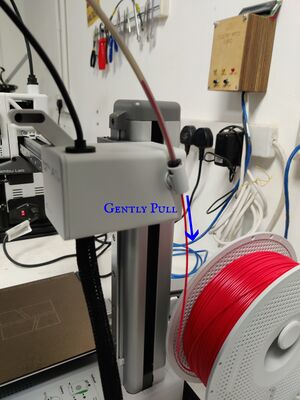
Unloading Filament
