Bike tools
| Information on this page is out of date. The specific problem is: Make sub-location and add more specific location details for each tool. Please help update the page if you can. The talk page may contain suggestions. (June 2019) |
- For how bike parking works at the Hackspace, see Bike storage.
This page details the assortment of bike tools available in the space, including photos. They are kept in the Bike Area.
Tools owned by and loaned to the Hackspace
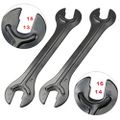
Sockets and Spanners
Puncture Repair Kits
This contains the glue and patches that you may need to repair a flat tyre.
Some air will naturally escape from your tyre over time, so If your bike has not been used for a while it may not actually have a puncture. Try pumping up your tyre and leaving it for an hour to see if it maintains the same pressure.
After using the glue, please endure that the lid is replaced tightly as the glue quickly evaporates.
How to use: https://www.youtube.com/watch?v=Q2sKMqB9QCg
Freewheel / Cassette Removal Tool and Chain Whip
-
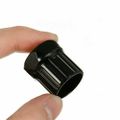
Cassette Removal/ Lockring Nut Tool
-
Chain Whip
These tools are for removing and refitting the rear sprockets from the rear wheel. A large adjustable spanner and grease are also useful.
The chain whip is compatible with the vast majority of cassettes and freewheels. There are a number of differently sized lockring nut tools, select the correct one for the wheel.
Freewheel vs Cassette
A freewheel will have the ratchet system (aka the clicky bit) built into it, whilst a cassette slides on to a separate ratchet system (the freehub). Many budget bicycles with 7 rear sprockets or less will be fitted with a freewheel, whilst other bikes will have a cassette.
How to use:
- How to Remove the Cassette or Freewheel from Bike Wheels (cjhoyle)
- Cassette Removal & Installation (Park Tool)
Chain Breaker / Chain Pliers
These tools are for “breaking” the chain open, which will enable you to remove your chain.
These days many new bikes come with a split link fitted to the chain, which can quickly be detached and re-attached using the chain pliers. If your chain does not have a split link, you will need to use the chain breaker to press a pin out of your chain to release it.
How to use: https://www.youtube.com/watch?v=P1qBdtmXZFo
Chain Gauge
Use this tool to check how worn your chain is. As you ride your bike, the pins in the chain wear down, causing your chain to stretch. Riding with a worn chain can wear down your sprockets, which can be costly to repair, so it is worth checking your chain wear regularly.
How to use: https://www.youtube.com/watch?v=gXd-3UnqoaM
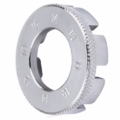
Wheel Truing Stand and Spoke Key
(Wheel Truing Stand on loan from Mike Haber)
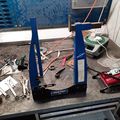
This tool is to check and straighten your wheels. Straight wheels are important for bikes with rim brakes, as it prevents the wheel rubbing on your brakes as you ride. It also allows means you can set your brakes closer to your rims, allow for sharper braking.
How to use: https://www.youtube.com/watch?v=9YqpZg_-FIM
Crescent Wrench
Most budget bikes use a cup-and-cone ball bearing system on the bottom bracket (the axle between the peddles/front sprocket). As the bearings wear, or if the cones loosen, you will start to feel play in the bottom bracket. The crescent wrench can be used along with a spanner to access and service these bearings.
How to use: https://www.youtube.com/watch?v=yrkqf91H_Zk
Bottom Bracket Cartridge Extractor
Many mid range and older bikes will be fitted with a non-serviceable Bottom Bracket cartridge. When this is worn out, the whole unit will need replacing. This tool enables you to remove and re-fit this part.
How to use: https://www.youtube.com/watch?v=yBnYoYVTnlo
Chainset Extractor
The Chainset is the collection of sprockets and the peddle arm in the centre of the bike. Most bikes are fitted with a two piece chain set where each side is pressed onto a centre axle (the bottom bracket). This tool enables you to push the chainset off the bottom bracket.
How to use: https://www.youtube.com/watch?v=8B6LdZPa4M8
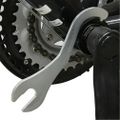
Pedal Wrench
This tool is for removing your bikes pedals. Please note that the right side pedal has a right-hand thread (ie. Turn anticlockwise to loosen). This can also be used as a cone wrench.
Cone Wrench
These wrenches are for removing and loosening the bearing cones on your wheel axles. You will need this tool when replacing your wheel bearings.
How to use: https://www.youtube.com/watch?v=PIB0tfz6ju4
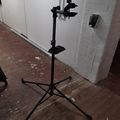
Workstand
It's a bit wobbly, so make sure the quick releases are tight. It's not secure enough to work on pedals or bottom brackets, but it's great for using to set up your brakes and gears. Best to secure your bike by the seatpost, but if your cables aren't routed along the top tube you could turn the clamp and secure it there too.
This stand is fully adjustable and can hold your bike in various positions. By using this stand, you will be able to suspend your bike, enabling you to turn the peddles and wheels uninhibited. When using the stand whilst setting your gears and brakes, make sure the stand’s grip is not pressing against any of your bike’s cables.
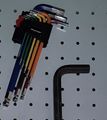
Allen Keys
Set up to 10mm and 1x12mm (can remove some freehub assemblies)
Consumables
All purpose Grease
Oil
A limited number of chain split links


