Radial Arm Saw: Difference between revisions
mNo edit summary |
mNo edit summary |
||
| Line 20: | Line 20: | ||
'''Switching On/Off''' | '''Switching On/Off''' | ||
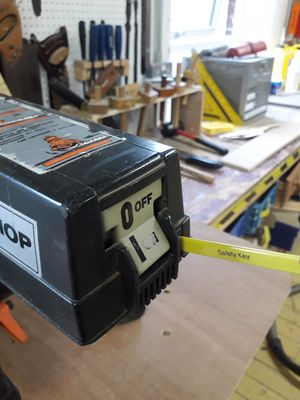
The saw is plugged into a wall socket. There is a contactor beneath the saw table at the front. On the saw arm nearest you there is an on /off switch. This switch will only power the saw when the | The saw is plugged into a wall socket. There is a contactor beneath the saw table at the front. On the saw arm nearest you there is an on /off switch. This switch will only power the saw when the white safety key is in its slot and angled upwards. '''AS OF 4/4/23 the safety key is permanently fitted in the on position''' Please switch off at the wall socket when you have finished the job. | ||
[[File:Radial arm saw detail.jpg|thumb]] | [[File:Radial arm saw detail.jpg|thumb]] | ||
Revision as of 14:20, 5 April 2023
| Radial Arm Saw | |
|---|---|
 | |
| Manufacturer | DeWalt |
| Model | Model 1251 |
| Location | Workshop |
| Team | Woodworking |
| Induction Required | No |
| Tools: all pages • list • Power Tools • Broken tools {{}} | |
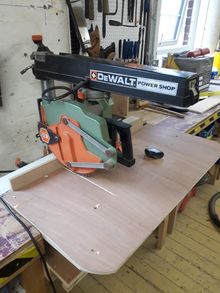
The Radial Arm Saw is a DeWalt Model 1251.
More versatile version of the Benchtop Mitre Saw.
The Radial Arm Saw is located in the Workshop.
What it Does.
This saw is used for cross cutting (cutting across the grain). The angle and depth of cut are easily adjustable.This makes it useful when cutting tenon joints and lap joints.( multiple cuts then removing waste with a chisel) If you read the manual or watch certain videos you will see that it is cabable of other woodworking operations such as ripping ( cutting along the grain). At the Hackspace we consider these to be unsafe and must not be performed.
Switching On/Off
The saw is plugged into a wall socket. There is a contactor beneath the saw table at the front. On the saw arm nearest you there is an on /off switch. This switch will only power the saw when the white safety key is in its slot and angled upwards. AS OF 4/4/23 the safety key is permanently fitted in the on position Please switch off at the wall socket when you have finished the job.

Radial Arm Saws are highly adjustable. This means that when you come to use it you cannot assume that it is cutting right angles. Consult the manual (hanging on the wall behind the saw) for adjustment options.
Operation
The saw starts behind the fence and the cut is performed by pulling the saw towards the operator. The saw blade rotates clockwise as you look at it from the left side of the machine. This means that the saw is driving itself through the cut. It is important that you control the saw by holding the saw handle whenever the blade is rotating. During the cutting operation the saw blade and handle will be pushed towards you. Keep you arm as straight as possible. It will then be easier to control the cut. This saw does take a bit of getting used to. Practise on a piece of scrap wood. (look in the bins) Also use these trial cuts to ensure that your angles are set correctly.
The fence can be moved from side to side by loosening the clamps at the back of the saw. When you cut a mitre the fence should be adjusted so that the blade passes through the existig cut in the fence. You may need to cut a piece from the end of the fence to achieve this. ( do this job on the sliding mitre saw )
When you have completed your job; please reset the saw to 90 degrees and set the blade height so that it just touches the surface of the table behind the fence.
Remember to use the dust extractor.