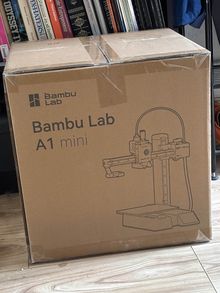
Bambu Lab A1 mini: Difference between revisions
Bauhaus1919 (talk | contribs) No edit summary |
Bauhaus1919 (talk | contribs) No edit summary |
||
| Line 43: | Line 43: | ||
Click the Preview tab to slice the model. You can move up and down between the layers to ensure certain areas will provide enough strength etc. | Click the Preview tab to slice the model. You can move up and down between the layers to ensure certain areas will provide enough strength etc. | ||
== | == Preapring to print == | ||
Check your filament is loaded. Load your filament by following the instructions on the A1 mini screen under Filament > load. Choose the filament type Generic PLA or Generic PETG etc. | Check your filament is loaded. Load your filament by following the instructions on the A1 mini screen under Filament > load. Choose the filament type Generic PLA or Generic PETG etc. | ||
Revision as of 16:59, 10 August 2024
| Bambu Lab A1 mini | |
|---|---|
 | |
| Manufacturer | Bambu |
| Model | A1 mini |
| Location | 3D Printer Area |
| Team | 3D Printing |
| Induction Required | No |
| Tools: all pages • list • Power Tools • Broken tools {{}} | |
This printer was installed in the Space on 7th August, 2024.
Buying Filaments
The A1 mini takes 1.75mm filament, so choose some PLA or PETG in your favourite colour.
The nozzle in the A1 mini is not hardened so do not use filaments that contain "fillers" such as Carbon fiber or glow in the dark - they will ruin the printer nozzle. (We will be getting a hardened nozzle in the near future if the use of the A1 mini justifies the expense)
PETG prints well, is tougher than PLA but can create strings if printing too fast - is better that PLA when coming into contact with water and will resist higher ambient temperatures than PLA.
PLA gives good detail and clean prints - is brittle and is not good to use in moist conditions - it will also tend to misform in high ambient temperatures.
You can buy branded Bambu filament off the Bambu store, or just shop about on Amazon.
Setting up the Bambu Studio slicer on your own laptop
The printer should appear in Bambu Studio (The recommended slicer for the A1 mini) under the device dropdown. If it doesn't, you may need to adjust your firewall settings.
When connecting to the printer, it will ask for a PIN code which can be found on the printer under Settings > LAN Only. Please do not press the refresh icon, as everyone else that already has setup their slicer will need to reset their PIN code.
Do not register the printer to any Bambu account - please leave this in LAN Only mode.
Slicing the part
Once the printer is configured in Bambu Studio, import your object (the slicer accepts a number of file formats) and orient it to minimise overhangs. Supports can be enabled if necessary.
Ensure that you are slicing for the correct filament you have loaded or will load into the printer.
Click the Preview tab to slice the model. You can move up and down between the layers to ensure certain areas will provide enough strength etc.
Preapring to print
Check your filament is loaded. Load your filament by following the instructions on the A1 mini screen under Filament > load. Choose the filament type Generic PLA or Generic PETG etc.
Check that the build plate is correctly positioned.
If you are happy with the timings etc of the sliced item go back to Bambu studio and in preview tab choose "Print plate", this will Send the sliced code to the printer and the print job will begin.
The printer will go through its startup routine (which includes auto bed levelling).
When the print is completed - wait a few minutes for the build plate to cool down and then it should be very easy to remove your printed item.
Cleaning up
Unload your filament by following the instructions on the A1 mini screen under Filament > unload.
Ensure the build plate is free of your printed item, supports and any filament purge lines (found at the front of the build plate).