Workshop metalwork wall: Difference between revisions
m Project box added, assumed completed |
m Danspencer101 moved page Workshop metalwork wall to Project:Workshop metalwork wall |
(No difference)
| |
Revision as of 12:37, 31 January 2019
| Workshop Metalwork Wall | |
|---|---|
| Created | 16/2/2014 |
| Members | DClarke, Tom |
| Status | Complete |
| Type | Hackspace Infrastructure |
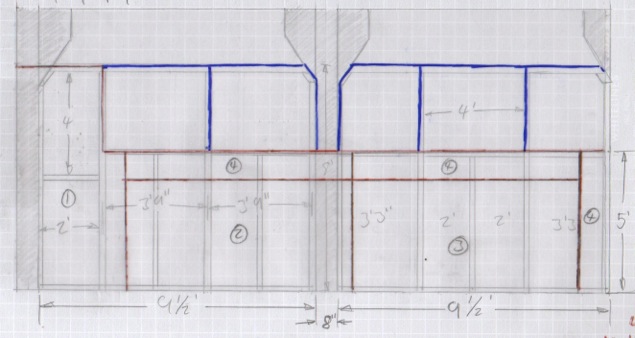
This project is to create a dividing wall between the metalworking area and the CNC / Laser cutting area.
This will keep welding and grinding dust out of the more delicate equipment in the workshop.
Construction Notes
Materials arrived Monday, and construction started. Notes for other people working on this project:
1. The board side is the metalwork area side - dictated by the immovable CNC bench, and need to have a long smooth wall to affix tool racks to.
2. To reduce board cutting, the overall length is 8'+8'+4' - there is a slight excess overlap of the first column.
3. The boards are temporarily in place, fixed (mostly) with 5mm x 30mm screws. Final fixing probably needs a number of longer screws to reinforce the construction. From the left (when viewing from the metalwork side) the boards are 'L', '1', and 2'.
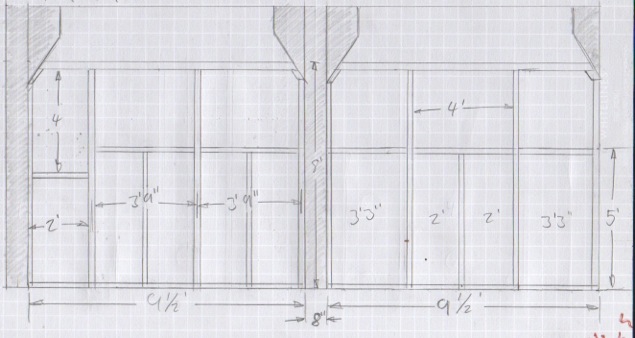
4. Two 'full' uprights (already cut to 8' - 2x long rail height) need to be fixed in each of the bays between the columns. Boards 'L' and '2' will need to be moved to secure the two behind the CNC bench then replaced. IMPORTANT NOTE: The spacing between these needs to be matched to available polycarbonate glazing - DETAILS TO COME.
5. Top horizontals can then be fitted over the verticals, using 3x2 noggins and plywood offcuts to secure the corners where appropriate.
6. The mistake in purchase - the 3.0 m lengths are slightly oversize compared to the shorter lengths. This is no problem for the top and bottom rails, but the middle, cut horizontals need to use the same material, to present a consistent level for the attachment of glazing. Alternatively - use the shorter material throughout (the long lengths can be used for the dusty area bench). Just don't mix the two!
7. the final board needs 2, 1' strips cutting to form the upper parts of panels '1' and '2'. Watch out for the poor quality of this plywood / splits etc. when cutting .
Plan
Tom created these drawings, showing the construction of the wall using 3" x 2" studding timeber, 12mm plywood and polycarbonate glazing.
Bill of materials
The following are to be delivered to the Hackspace on monday afternoon, 17/2/2014
20 2.4m lengths of 3" x 2" CLS studding timber 6 3.0m lengths of 3" x 2" planed timber (actually slightly smaller then the CLS, buy will do) 4 sheets of 12mm softwood plywood
Polycarbonate sheeting for glazing will be ordered once the size of the 'windows' are known.

