Bench Sanders: Difference between revisions
Link images to tool page |
|||
| (26 intermediate revisions by 6 users not shown) | |||
| Line 1: | Line 1: | ||
This page details the space's belt and disc sanders, information on their operation and cleaning up afterwards. | |||
'''Do not use these machines with materials that will generate silica dust. eg soapstone and other soft stones, sandstone, ceramics, gemstones''' | |||
a good reference on this subject https://ehs.princeton.edu/health-safety-the-campus-community/art-theater-safety/art-safety/sculpture | |||
We have three larger disc / belt sanders in the [[Dusty Area]]: | |||
{| class="wikitable" | |||
|- | |||
| [[File:Sander DS3000.JPG|200px|link=Record Power DS3000 Disc Scander]] || [[File:Sander 3.JPG|200px|link=Record Power Disc & Belt Sander]] || [[File:Sander.JPG|200px|link=Denford TDS25 Belt & Disc Sander]] | |||
|- | |||
|[[Record Power DS3000 Disc Scander]] || [[Record Power Disc & Belt Sander]] || [[Denford TDS25 Belt & Disc Sander]] | |||
|} | |||
== Belt and Disc Cleaning == | == Belt and Disc Cleaning == | ||
[[File:Block.jpg|thumb|200px|Silverline 224688 Sanding Belt Cleaning Block]] | |||
As abrasive discs and belts are is used they fill up with waste material. To remove this, apply the belt/disc cleaning block to the surface of the abrasive, and 'sand away' the accumulated waste. This restores the abrasive's original colour, and greatly extends it life. | As abrasive discs and belts are is used they fill up with waste material. To remove this, apply the belt/disc cleaning block to the surface of the abrasive, and 'sand away' the accumulated waste. This restores the abrasive's original colour, and greatly extends it life. | ||
Do not allow discs and belts to get clogged up - this reduces the abrasives effectiveness, and they, and the workpiece overheat, and it takes more effort to achieve the results you want. | Do not allow discs and belts to get clogged up - this reduces the abrasives effectiveness, and they, and the workpiece overheat, and it takes more effort to achieve the results you want. | ||
Belt Cleaner: | Belt Cleaner: [http://www.toolstation.com/shop/Power+Tool+Accessories/d80/Cloth+Belts/sd2744/Belt+Cleaning+Stick/p37031 Toolstation Item 37031]''(deadlink April 2019)'' / Silverline 224688 or 218490 . | ||
== Dust Extraction and Safety == | == Dust Extraction and Safety == | ||
All of the sanders in the dusty area are connected to the large green extractor. This is switched on at a central location. Please remember to switch it off when the job is done as this saves electricity. | |||
Remember that breathing dust can be hazardous to health. Wear a dust mask when using these tools. You may also find ear defenders useful as the ShopVac is rather noisy in operation! | Remember that breathing dust can be hazardous to health. Wear a dust mask when using these tools. You may also find ear defenders useful as the ShopVac is rather noisy in operation! | ||
| Line 49: | Line 30: | ||
Even with vacuum extraction, using these machines still creates a lot of dust. Always brush / vacuum away after use so as to leave the equipment ready for the next person. | Even with vacuum extraction, using these machines still creates a lot of dust. Always brush / vacuum away after use so as to leave the equipment ready for the next person. | ||
==See also== | |||
* [[Tools/We Have/Power Tools]] - the space also has several hand-held power sanders | |||
{| class="wikitable" | |||
|- | |||
| [[File:Makita_sander.png|200px]] || [[Makita 150mm Random Orbital Sander]] | |||
|- | |||
| [[File:Nottinghack Tools Detail Sanders.jpg|200px]]|| Bosch PSM80A Mouse (Large) Bosch PDA120E (Small, Green) Challenge MS3467 (Small, Blue) - May have broken / been removed | |||
|- | |||
| [[File:Nottinghack Tools Various Sanders.jpg|200px]]|| Ferm VM-150 1/3 Sheet Finishing Sander 135W PowerCraft 2408 Belt Sander 950W PowerCraft S1A-AK2J8-125TB 125mm Rotary Orbital Sander 420W - May have broken / been removed | |||
|} | |||
[[Category:Woodwork]] | |||
Latest revision as of 20:14, 17 April 2025
This page details the space's belt and disc sanders, information on their operation and cleaning up afterwards.
Do not use these machines with materials that will generate silica dust. eg soapstone and other soft stones, sandstone, ceramics, gemstones a good reference on this subject https://ehs.princeton.edu/health-safety-the-campus-community/art-theater-safety/art-safety/sculpture
We have three larger disc / belt sanders in the Dusty Area:
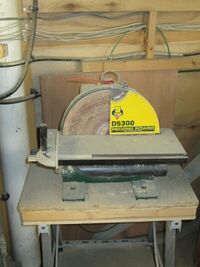 |
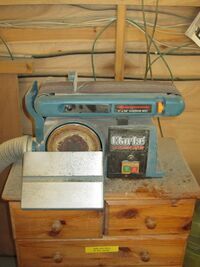 |
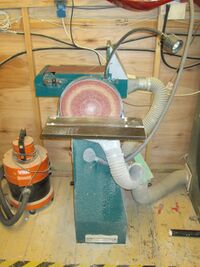
|
| Record Power DS3000 Disc Scander | Record Power Disc & Belt Sander | Denford TDS25 Belt & Disc Sander |
Belt and Disc Cleaning
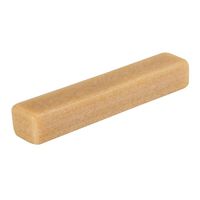
As abrasive discs and belts are is used they fill up with waste material. To remove this, apply the belt/disc cleaning block to the surface of the abrasive, and 'sand away' the accumulated waste. This restores the abrasive's original colour, and greatly extends it life.
Do not allow discs and belts to get clogged up - this reduces the abrasives effectiveness, and they, and the workpiece overheat, and it takes more effort to achieve the results you want.
Belt Cleaner: Toolstation Item 37031(deadlink April 2019) / Silverline 224688 or 218490 .
Dust Extraction and Safety
All of the sanders in the dusty area are connected to the large green extractor. This is switched on at a central location. Please remember to switch it off when the job is done as this saves electricity.
Remember that breathing dust can be hazardous to health. Wear a dust mask when using these tools. You may also find ear defenders useful as the ShopVac is rather noisy in operation!
Clean Up Afterwards!
Even with vacuum extraction, using these machines still creates a lot of dust. Always brush / vacuum away after use so as to leave the equipment ready for the next person.
See also
- Tools/We Have/Power Tools - the space also has several hand-held power sanders
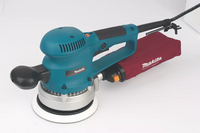 |
Makita 150mm Random Orbital Sander |
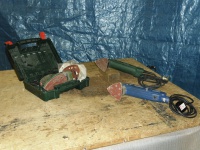 |
Bosch PSM80A Mouse (Large) Bosch PDA120E (Small, Green) Challenge MS3467 (Small, Blue) - May have broken / been removed |
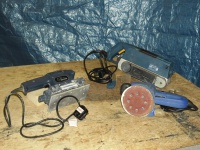 |
Ferm VM-150 1/3 Sheet Finishing Sander 135W PowerCraft 2408 Belt Sander 950W PowerCraft S1A-AK2J8-125TB 125mm Rotary Orbital Sander 420W - May have broken / been removed |