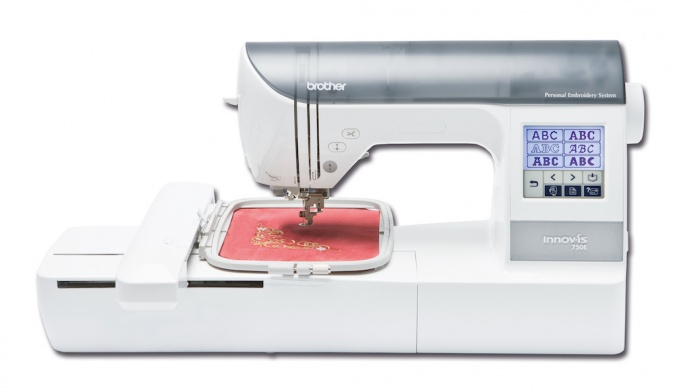
|
|
| Line 12: |
Line 12: |
| [[Category:Tools and Equipment]] | | [[Category:Tools and Equipment]] |
|
| |
|
| ===Induction Notes=== | | ===Inductions=== |
| Pre-work - read through the Quick Ref guide. (Not mandatory, but helps)
| |
|
| |
|
| Machine Setup | | {{also|Embroidery Machine/Inductions}} |
| * Card activated by inductor
| |
| * Ensuring a clear work area
| |
| * Check the lower bobbin has plenty of thread of an appropriate colour
| |
| * Winding a lower bobbin
| |
| ** '''Ensure thread is properly around tensioner when winding a bobbin'''
| |
| ** bobbin winding does not stop on its own - you need to watch for it getting full and stop the winding when it starts to have trouble
| |
| * Installing lower bobbin
| |
| * Installing upper bobbin and threading through
| |
| ** Ensure top bobbin is fully to the right, and bobbin holder is butted against it correctly
| |
| | |
| Initial runthrough using built-in functions
| |
| * Inserting frame
| |
| ** Also cover how to apply backing material
| |
| ** What to do if material is smaller than frame (support it with backing material)
| |
| * Sew text and a frame
| |
| * Include adjusting the size and layout of the design
| |
| * How to change thread colour
| |
| * Finishing the design
| |
| ** '''Only ever press the thread cut button ONCE''' Only required at the end of the design
| |
| * Removing the frame and work
| |
| | |
| Using the PC software
| |
| * Using the PC to get a design set up
| |
| * Compatible filetypes for the machine are .pes and .dst
| |
| ** Use the Nottinghack H? Can even have a scout-badge style design for them to create as part of induction to take away
| |
| * Transferring the design from PC to Machine
| |
| ** '''Ensure machine isn't simply sewing over same area repeatedly''' Watch machine during initial sewing, and ensure you are in the same area during operation
| |
| | |
| Pack down
| |
| * Removing top bobbin and thread
| |
| * Dust cover
| |
| | |
| Special attention areas
| |
| * Do not use thread cutter button if thread is already cut, or a heavy gauge thread (like nylon or #30 thread)
| |
| * Ensure thread is properly around tensioner when spooling a bobbin for the underneath
| |
| [[File:Embroidery bobbin error.jpg|thumbnail|badly tensioned bobbin]]
| |
| * Make sure top bobbin is properly pushed to the right and holder butted against it
| |
| * Set machine up THEN attach frame
| |
| | |
| Mounting garments, etc.
| |
| * cupping of garments
| |
| * dealing with small items on a big frame
| |
| * continuing existing designs and building up large areas
| |
| * spray mount
| |
| * special materials (e.g. towelling and velvet with a nap)
| |
| * water-soluble interfacing
| |
| | |
| The Changing Of The Needle
| |
| * the needle needs to be tight in the collet, finger tight is not adequate, use the screwdriver provided!
| |
| | |
| ===further reading===
| |
| [http://libregraphicsworld.org/blog/entry/embroidery-design-on-linux-now-possible-with-thred linux software @ libregraphicsworld.org]
| |
| | |
| Check out Vince J. Accuri's very detailed videos of the Brother PE-770, especially these ones: -
| |
| * Upper thread take-up arm problems: https://www.youtube.com/watch?v=MiuDKcCfj4U
| |
| * Bobbin case tension testing: https://www.youtube.com/watch?v=MBV-MJI9RHg
| |
| * Needle hook timing: https://www.youtube.com/watch?v=_OO0hJHLMFo
| |
